September 19, 2019
I have a 10” x 10” painting to do for the upcoming 65th anniversary gala of my art society,
and for that I’ve decided to do some negative painting. I’ve used a photo of a jay from one
of our walking trips as reference, but the rest of the painting is going to be entirely
abstracted. The piece is in the planning stages right now, but here’s an early option,
done digitally:
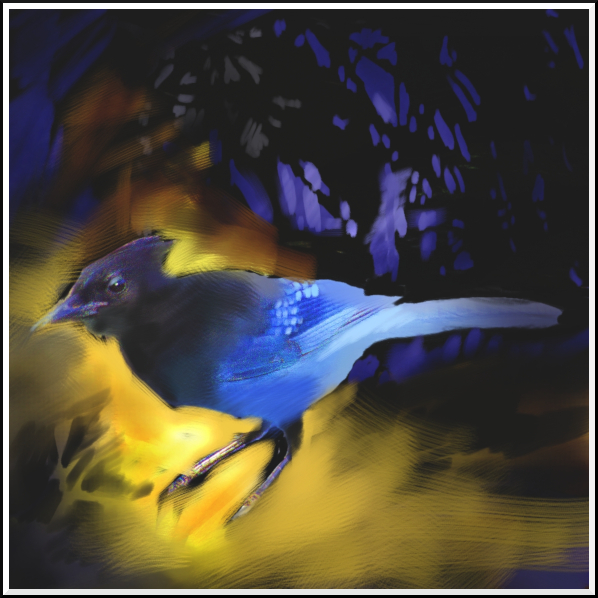
©2019 Jennifer Georgeadis. 8cm x 8cm, digital oil paint

©2019 Jennifer Georgeadis. 8cm x 8cm, digital oil paint
August 30, 2019
Today, a few slightly more comical try-outs:
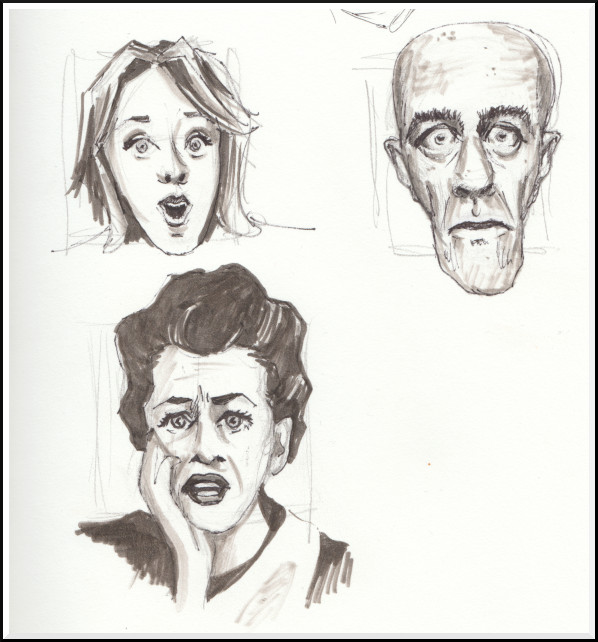
©2019 Jennifer Georgeadis. 15cm x 17cm, ink on sketchbook paper

©2019 Jennifer Georgeadis. 15cm x 17cm, ink on sketchbook paper
August 24, 2019
Continuing on from last week’s work, I thought I’d try sketching facial expressions
using limited lines, this time with stills of Elizabeth Montgomery as reference:
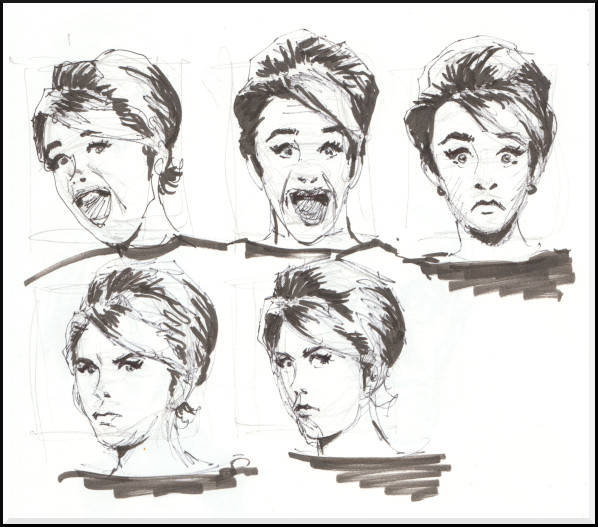
©2019 Jennifer Georgeadis. 16.5cm x 15cm, ink on sketchbook paper

©2019 Jennifer Georgeadis. 16.5cm x 15cm, ink on sketchbook paper
August 16, 2019
Just a note first to say that this is my 1000th blog post! Wow!!
I started this blog in May, 2011 as a way of not only motivating myself to get out of the “lazy artist” trap, but more importantly, to strengthen my skills. I started out back then with more time on my hands, and was able to post new work every weekday (what?!), which turned out to be a fantastic way to learn to think quickly and creatively, and to jump right into any style I wanted to learn. The blog has given me a safe place to try out just about everything and anything, and even if the piece wasn’t always successful, I posted it anyway and hopefully learned something in the process. Some of the work quickly led to other projects, and some were one-time-only experiments. I’m glad I called the blog Meanderings, because that means there are no rules and anything goes!
What I’ve learned over the past eight years is that it's absolutely essential for artists to do some art every single day, no matter how small or simple, even if no-one will ever see it. The ways establishing a daily practice has helped me are inumerable, not only in the hard skills I’ve learned, but in the immesurable confidence I’ve developed as a result of it.
Thank you very much for visiting here, whether you’ve been here for a while, since the beginning or if this is your first visit. Now, on to today’s post!
This week I wanted to try out a few ink drawing styles that simplified complex figurative imagery. Here are a couple days’ worth of tryouts:
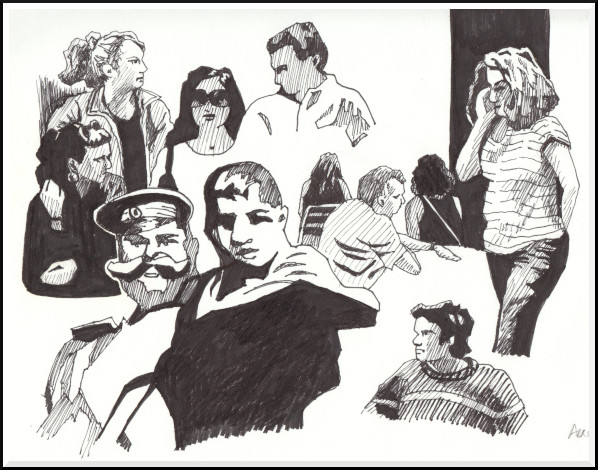
©2019 Jennifer Georgeadis. 22cm x 17cm, ink on sketchbook paper
I started this blog in May, 2011 as a way of not only motivating myself to get out of the “lazy artist” trap, but more importantly, to strengthen my skills. I started out back then with more time on my hands, and was able to post new work every weekday (what?!), which turned out to be a fantastic way to learn to think quickly and creatively, and to jump right into any style I wanted to learn. The blog has given me a safe place to try out just about everything and anything, and even if the piece wasn’t always successful, I posted it anyway and hopefully learned something in the process. Some of the work quickly led to other projects, and some were one-time-only experiments. I’m glad I called the blog Meanderings, because that means there are no rules and anything goes!
What I’ve learned over the past eight years is that it's absolutely essential for artists to do some art every single day, no matter how small or simple, even if no-one will ever see it. The ways establishing a daily practice has helped me are inumerable, not only in the hard skills I’ve learned, but in the immesurable confidence I’ve developed as a result of it.
Thank you very much for visiting here, whether you’ve been here for a while, since the beginning or if this is your first visit. Now, on to today’s post!
This week I wanted to try out a few ink drawing styles that simplified complex figurative imagery. Here are a couple days’ worth of tryouts:

©2019 Jennifer Georgeadis. 22cm x 17cm, ink on sketchbook paper
August 8, 2019
The White Rock Sea Festival was this weekend, and the Torchlight Parade was a huge success!
In fact, our theatre won an award – Best Non-Profit Entry. One of the signs I painted ended up
on the front of a gorgeous Bentley(!), and several of our volunteers dressed up as vampires, victims
and undertakers to accompany our coffin and entertain the crowd. It was a beautiful, sunny evening
for a parade, and wonderful to have our hard work recognized.
For the blog today I thought I’d try out something a little different. For the front panel of a greeting card I’m working on I did a fast, loose wash of intense watercolour pigment and then added ink lines to define shapes:
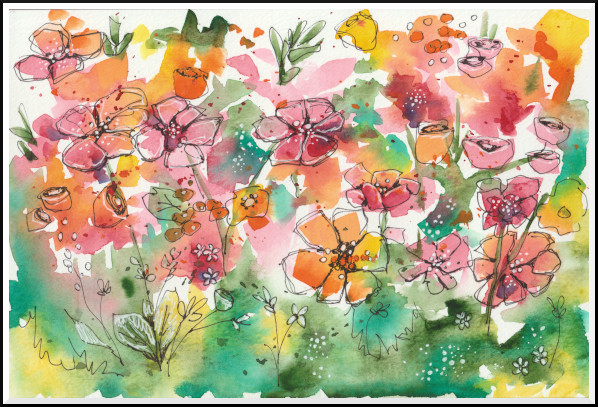
©2019 Jennifer Georgeadis. 23cm x 15cm, watercolour and ink on watercolour paper block
For the blog today I thought I’d try out something a little different. For the front panel of a greeting card I’m working on I did a fast, loose wash of intense watercolour pigment and then added ink lines to define shapes:

©2019 Jennifer Georgeadis. 23cm x 15cm, watercolour and ink on watercolour paper block
August 1, 2019
Work on the coffin for the White Rock Sea Festival has taken some long hours over the past few days,
but I’m very happy with how it turned out. Our talented builder Robin Maggs built the coffin, and
even before it was painted I had a lot of great detail to work with:
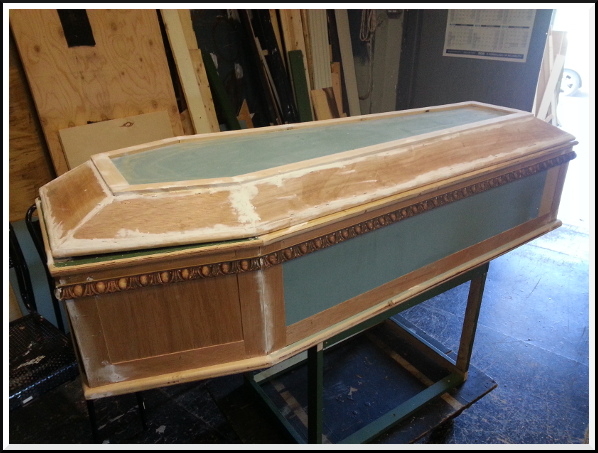
©2019 Jennifer Georgeadis.
I started with a warm cream colour for a primer, then brushed in a couple of medium-brown colours for a rough underpainting:
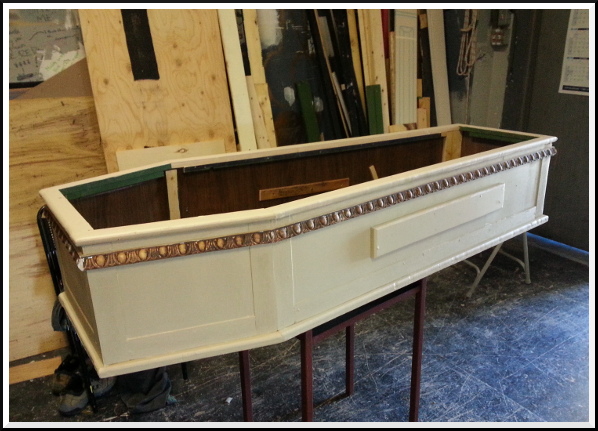
©2019 Jennifer Georgeadis.
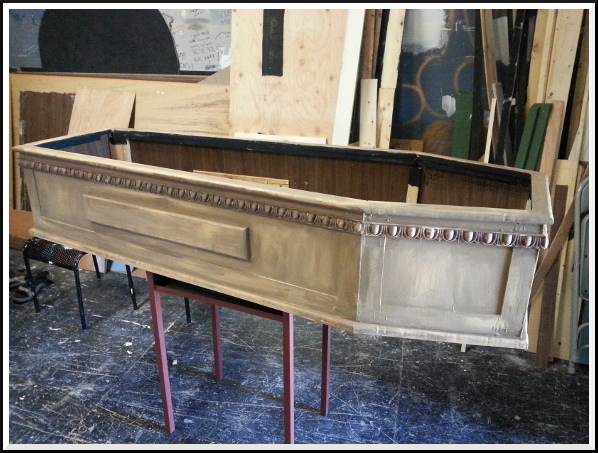
©2019 Jennifer Georgeadis.
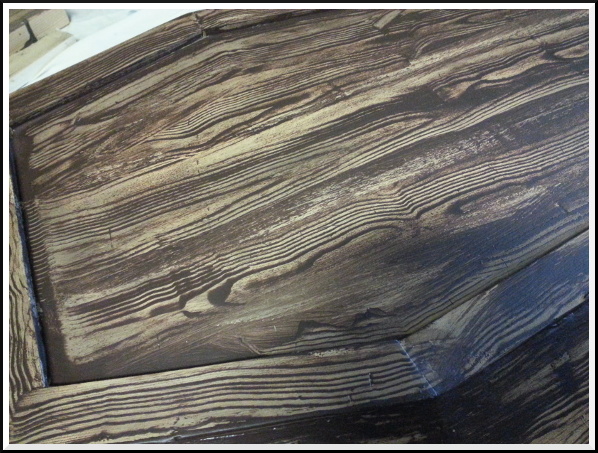
The next part turned out to be lots of fun. I found a wood-graining tool at a craft shop that allows me to create all kinds of lines and wood knots, depending on the angle it’s used. All I needed to do was paint a dark brown over my underpainting, then drag the tool over the surface in a few passes. The process is deceptively simple, but the results were great:
©2019 Jennifer Georgeadis.
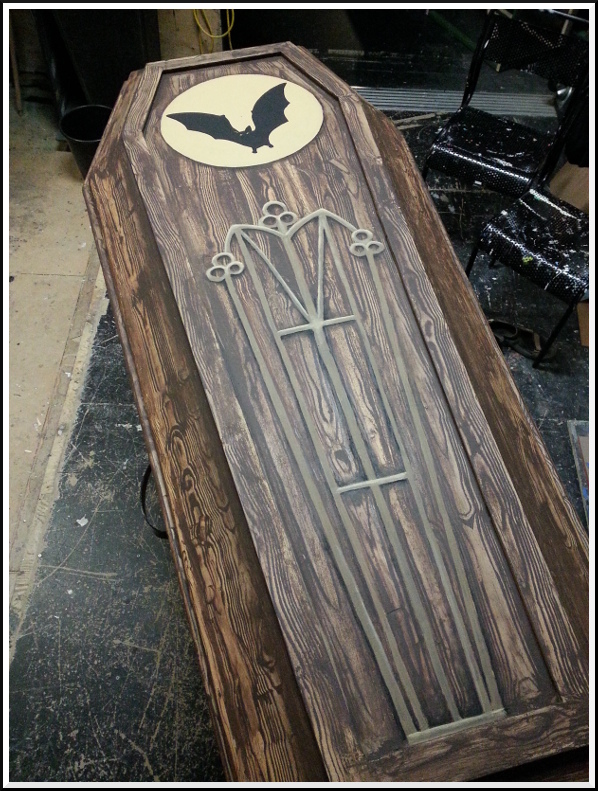
The last stage was to paint some decorative detail on the coffin lid. Since this play is definitely on the wacky side, I opted for a slightly hammy bat silhouette, then painted in a gothic-style, faux-metal inlay:
©2019 Jennifer Georgeadis.
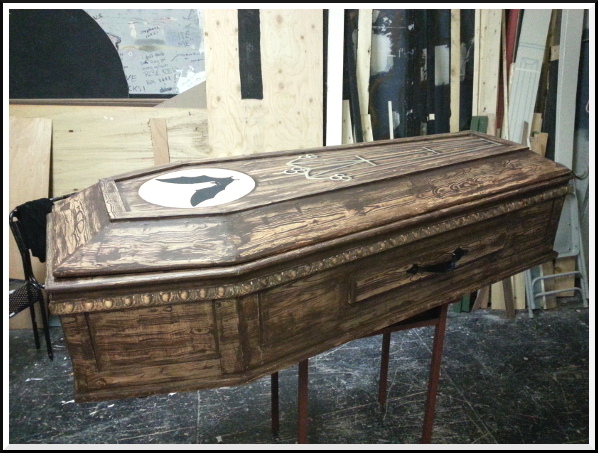
Here’s the finished coffin:
©2019 Jennifer Georgeadis.
Of course, no vampire coffin is complete without someone hanging around inside!
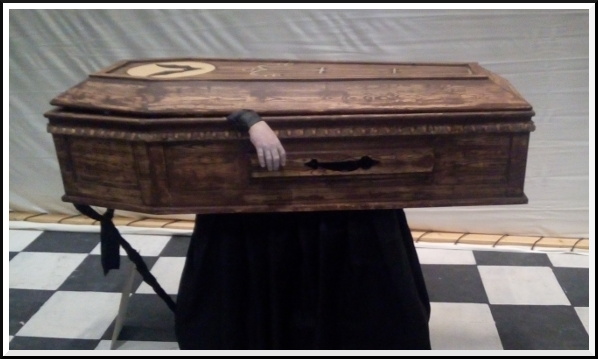
Photo courtesy of Robin Maggs

©2019 Jennifer Georgeadis.
I started with a warm cream colour for a primer, then brushed in a couple of medium-brown colours for a rough underpainting:

©2019 Jennifer Georgeadis.

©2019 Jennifer Georgeadis.
The next part turned out to be lots of fun. I found a wood-graining tool at a craft shop that allows me to create all kinds of lines and wood knots, depending on the angle it’s used. All I needed to do was paint a dark brown over my underpainting, then drag the tool over the surface in a few passes. The process is deceptively simple, but the results were great:

©2019 Jennifer Georgeadis.
The last stage was to paint some decorative detail on the coffin lid. Since this play is definitely on the wacky side, I opted for a slightly hammy bat silhouette, then painted in a gothic-style, faux-metal inlay:

©2019 Jennifer Georgeadis.
Here’s the finished coffin:

©2019 Jennifer Georgeadis.
Of course, no vampire coffin is complete without someone hanging around inside!

Photo courtesy of Robin Maggs
July 26, 2019
I can add one more item to my ever-growing list of art-related things I’ve done (but never imagined I’d do) – helping
put together a parade float. The White Rock Sea Festival is an August long-weekend event on the waterfront that celebrates
all things summery seaside fun, with live performances, a market, fireworks and on the final evening, a torchlight parade.
This year our theatre will be in the parade, showcasing our upcoming production of Dracula: The Bloody Truth, as well as
celebrating our 75th season.
The festival is of course just over a week away (gah!!), and I’ve been very busy making signs and helping create a coffin for our float. The signs are meant to be carried by some of our volunteers, so they’ve been designed large enough to be easily seen but small enough to be portable and easily handled.
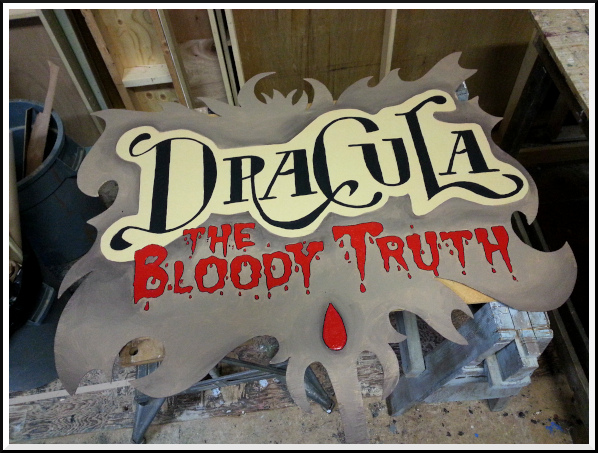
The Dracula sign has a handle built into the bottom and the dimensions are approximately 153 centimetres square. The red lettering and blood drop is painted in crimson gloss paint for that added ick-factor:
©2019 Jennifer Georgeadis.
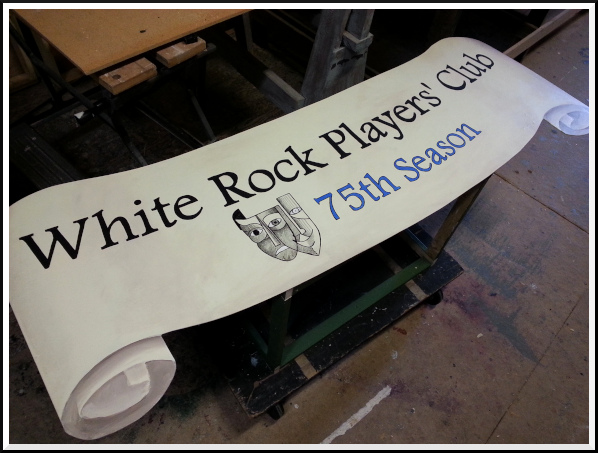
The banner sign was cut into a scroll shape, and I painted in the shadows for the paper loops as well as some subtle shading to give it a bit more dimension. I projected the text to get it placed perfectly, penciled it in, then painted it. The logo was made with a black marker, then graphite for fine detail and shading. The sign is around 200 centimetres long, so painting it took a while!
©2019 Jennifer Georgeadis.
Today I finished priming the coffin. There’s a lot of detail to be done on that including a faux wood grain and some faux low-relief carving, all achieved with just paint. I’ll share that next week when it’s finished. Wish me luck!
The festival is of course just over a week away (gah!!), and I’ve been very busy making signs and helping create a coffin for our float. The signs are meant to be carried by some of our volunteers, so they’ve been designed large enough to be easily seen but small enough to be portable and easily handled.
The Dracula sign has a handle built into the bottom and the dimensions are approximately 153 centimetres square. The red lettering and blood drop is painted in crimson gloss paint for that added ick-factor:

©2019 Jennifer Georgeadis.
The banner sign was cut into a scroll shape, and I painted in the shadows for the paper loops as well as some subtle shading to give it a bit more dimension. I projected the text to get it placed perfectly, penciled it in, then painted it. The logo was made with a black marker, then graphite for fine detail and shading. The sign is around 200 centimetres long, so painting it took a while!

©2019 Jennifer Georgeadis.
Today I finished priming the coffin. There’s a lot of detail to be done on that including a faux wood grain and some faux low-relief carving, all achieved with just paint. I’ll share that next week when it’s finished. Wish me luck!
July 12, 2019
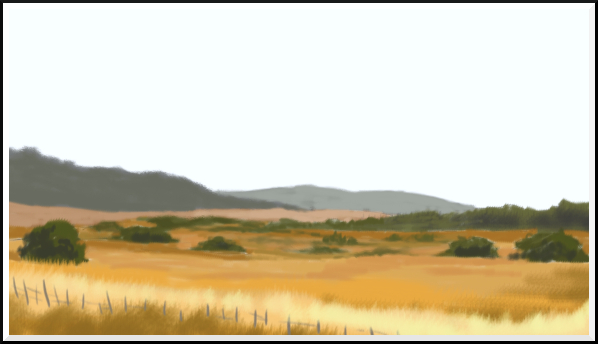
I’ve been busy the past couple of weeks working on a digital project. So far I’ve been developing a
landscape complete with small, individual elements that will be placed around the scene where needed.
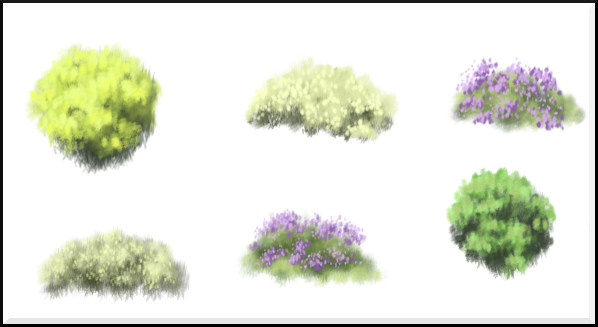
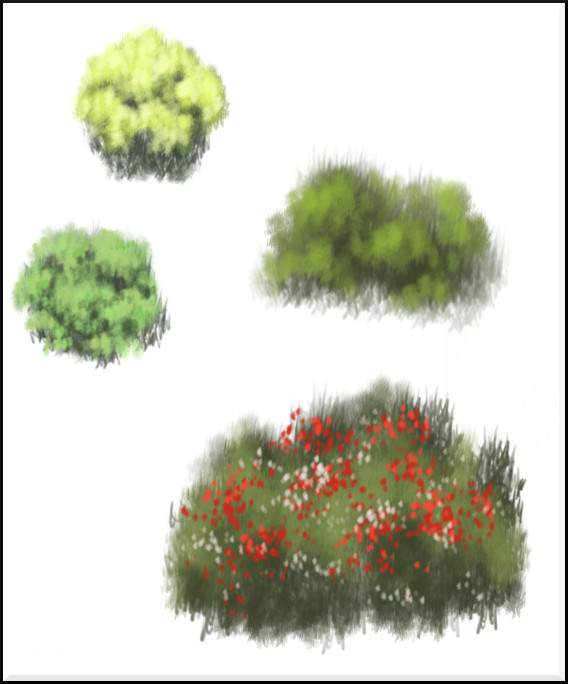
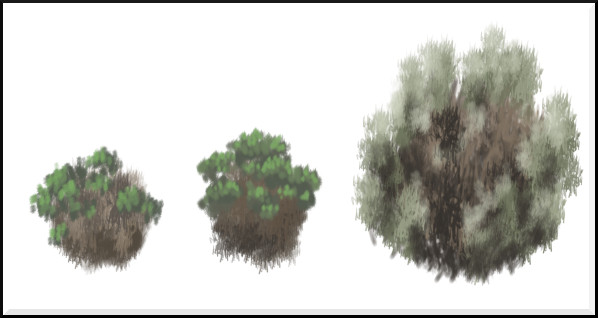
One new skill I’ve developed in this process is creating digital paintbrushes to suit the foliage I need to create. That’s a great tool that I’ve been aware of for a long while, but I’ve never had need to make them before. I’m sure before long I will have developed quite a library of custom brushes for myself!
Here are a few of the elements I’ve been working on:
©2019 Jennifer Georgeadis. Digital acrylic
©2019 Jennifer Georgeadis. Digital acrylic
©2019 Jennifer Georgeadis. Digital acrylic
©2019 Jennifer Georgeadis. Digital acrylic
June 19, 2019
Sketchbook
June 13, 2019
Sketchbook
<--- Newer Older --->
© 2011-2022 Jennifer Georgeadis.
One new skill I’ve developed in this process is creating digital paintbrushes to suit the foliage I need to create. That’s a great tool that I’ve been aware of for a long while, but I’ve never had need to make them before. I’m sure before long I will have developed quite a library of custom brushes for myself!
Here are a few of the elements I’ve been working on:

©2019 Jennifer Georgeadis. Digital acrylic

©2019 Jennifer Georgeadis. Digital acrylic

©2019 Jennifer Georgeadis. Digital acrylic

©2019 Jennifer Georgeadis. Digital acrylic
June 19, 2019
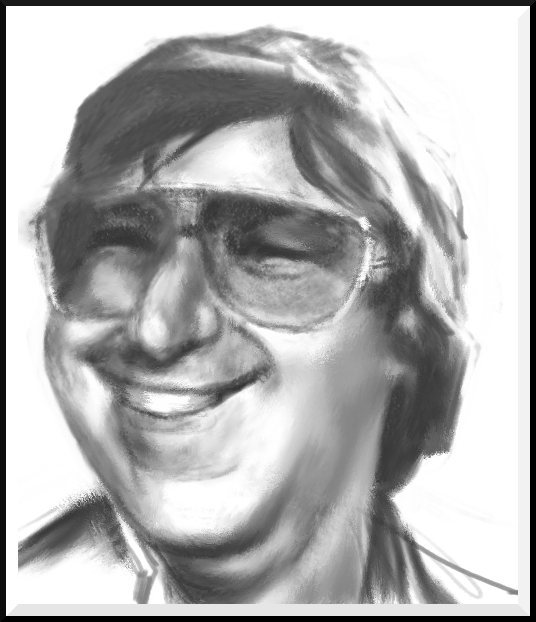
I’m still working on caricature faces when I get the chance. Here’s my latest sketch:
©2019 Jennifer Georgeadis. 4cm x 5cm, digital charcoal

©2019 Jennifer Georgeadis. 4cm x 5cm, digital charcoal
June 13, 2019
I’ve just finished three weeks working on a stage set for our local theatre group’s production of
Laughter on the 23rd Floor. This one was extra challenging for a couple of reasons; one, I was
tasked with working on a background mural that was a daunting eighteen and a half feet wide and
eight feet tall, and two, because this time we were a skeleton crew of just a few (very hard-working,
dedicated) people from start to finish.
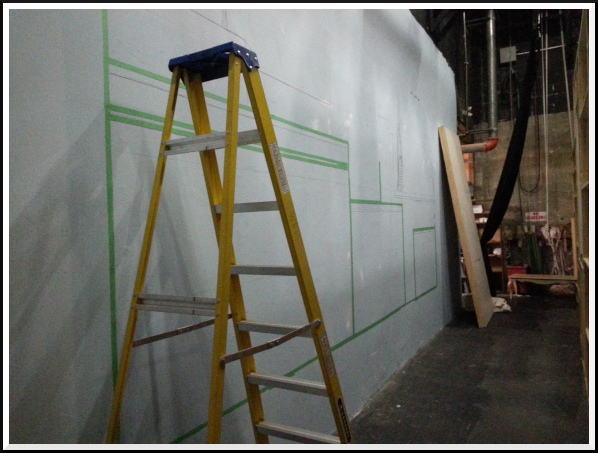
While the building crew were finishing the set, I got a sense of what sort of space I had to paint the mural. The work was going to be done on the pale blue wall behind the set:
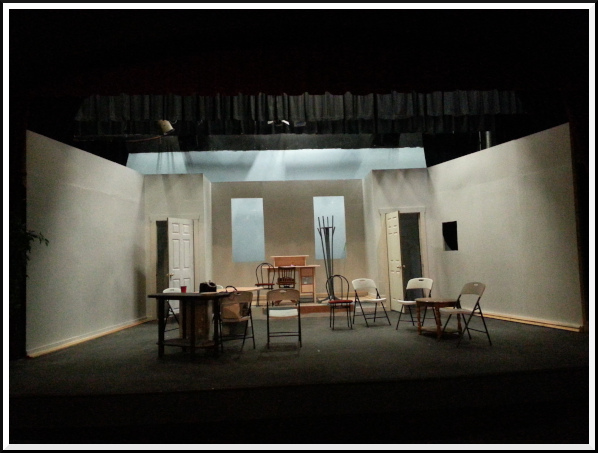
Although the windows were narrow, the set was built six feet away from the wall, which meant that audience members, depending on where they were seated, would be able to see quite a bit of the wall. I marked out sight lines and found that the mural would have to be very wide and very tall.
The mural was to be a cityscape of lower Manhattan, circa 1953. I made a digital mock-up of the cityscape, but kept the shapes fairly simple as there was very limited time to paint it. Since there wasn’t room to use a projector to transfer the building shapes on the wall, I made a big grid on the wall to correspond with another on the mock-up, then began to draw in lines and tape edges:
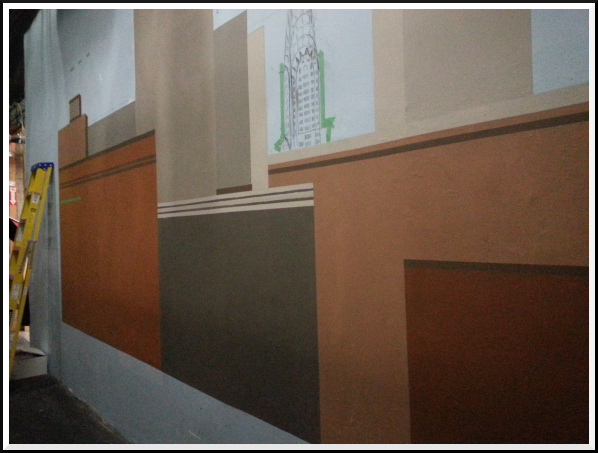
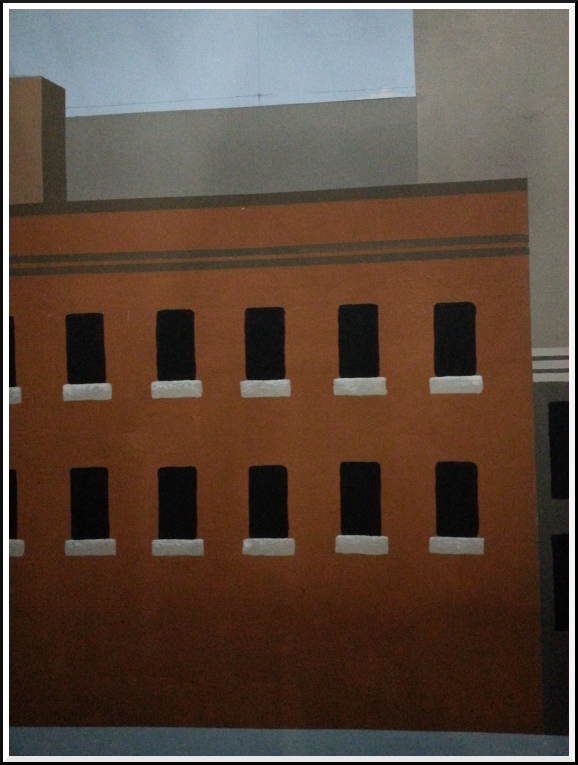
I chose a limited colour palette and began to fill in flat colour. I emphasized distance by gradually lightening the colours from the middle ground to the background shapes, and keeping details to the foreground shapes:
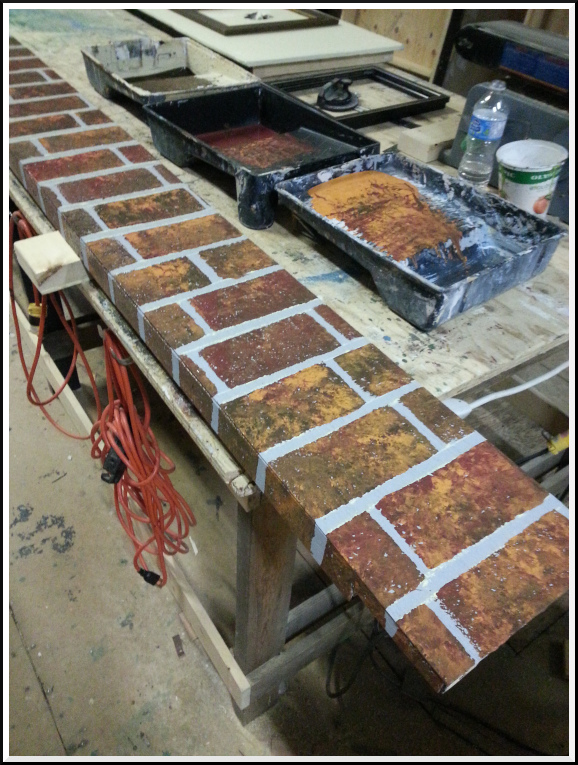
For this play the set is meant to look like two rooms that have been combined into one, with the remnants of a brick wall in the middle. I was tasked with painting the brick, something I’d never done before. My friend Andrea, a set design veteran, gave me a quick tutorial over the phone, and I launched into it. The idea is to cut a large cleaning sponge into something roughly brick-shaped, prepare three trays of paint, brown, red and orange, then dip the sponge flat into each color and stamp with it. I found it worked best to start with brown and follow with red, then orange. The faux brick is painted on top of a cement-coloured grey base. This was the brickwork finished:
Here’s the faux-finish up close:
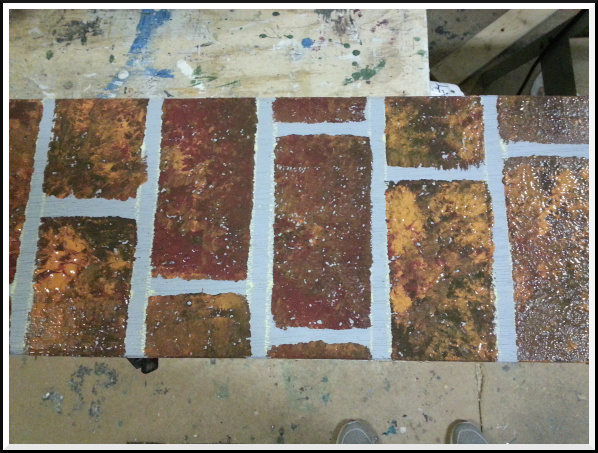
Due to serious time constraints and so few hands on deck I wasn’t able to put as much work as I would have liked into the mural. My next task was to lend a hand in painting the rest of the set, including a very complex checkerboard floor. We finished in time, which was the most important thing!
Here is the finished set, complete with props and furniture:
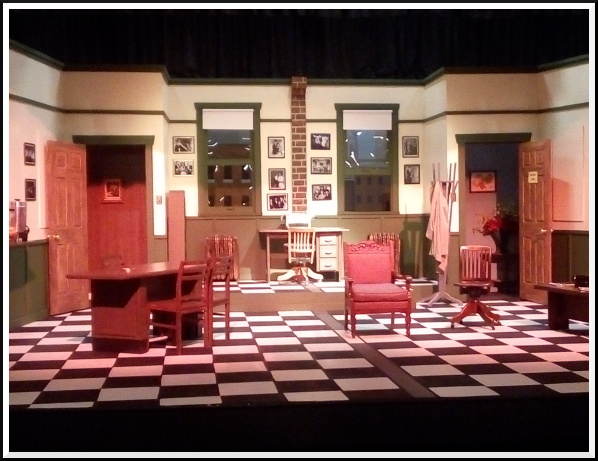
Photo courtesy of Robin Maggs
While the building crew were finishing the set, I got a sense of what sort of space I had to paint the mural. The work was going to be done on the pale blue wall behind the set:

Although the windows were narrow, the set was built six feet away from the wall, which meant that audience members, depending on where they were seated, would be able to see quite a bit of the wall. I marked out sight lines and found that the mural would have to be very wide and very tall.
The mural was to be a cityscape of lower Manhattan, circa 1953. I made a digital mock-up of the cityscape, but kept the shapes fairly simple as there was very limited time to paint it. Since there wasn’t room to use a projector to transfer the building shapes on the wall, I made a big grid on the wall to correspond with another on the mock-up, then began to draw in lines and tape edges:

I chose a limited colour palette and began to fill in flat colour. I emphasized distance by gradually lightening the colours from the middle ground to the background shapes, and keeping details to the foreground shapes:


For this play the set is meant to look like two rooms that have been combined into one, with the remnants of a brick wall in the middle. I was tasked with painting the brick, something I’d never done before. My friend Andrea, a set design veteran, gave me a quick tutorial over the phone, and I launched into it. The idea is to cut a large cleaning sponge into something roughly brick-shaped, prepare three trays of paint, brown, red and orange, then dip the sponge flat into each color and stamp with it. I found it worked best to start with brown and follow with red, then orange. The faux brick is painted on top of a cement-coloured grey base. This was the brickwork finished:

Here’s the faux-finish up close:

Due to serious time constraints and so few hands on deck I wasn’t able to put as much work as I would have liked into the mural. My next task was to lend a hand in painting the rest of the set, including a very complex checkerboard floor. We finished in time, which was the most important thing!
Here is the finished set, complete with props and furniture:

Photo courtesy of Robin Maggs


